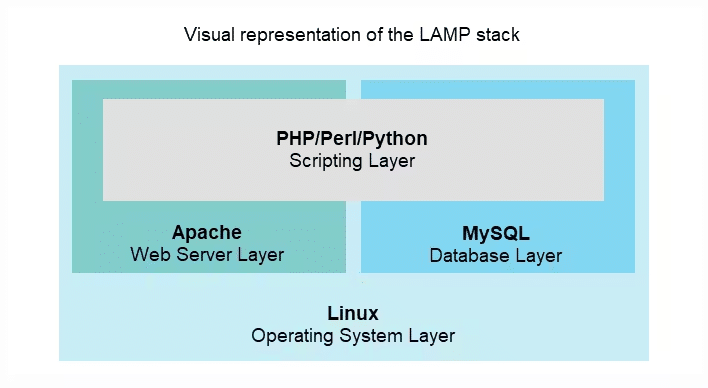
A LAMP stack is a collection of four different software that programmers and web developers use to create and deploy the website.
LAMP stands for:
L – Linux (Operating System) – an Open-source OS (Operating System) that is widely used for servers
A – Apache (Web Server) – a Web Server that serves HTTP and HTTPS requests
M – MySQL or Maria DB (Databases) – open-source Relational Database Management Systems (RDBMS)
P – PHP, Pearl, Python (Programming Language) – PHP is an acronym for Hypertext Pre-processor. PHP is the most used server-side programming language on the web 79.2% of all websites rely on PHP
Step 1: Linux Setup:
If you’re using any of the main cloud providers then there’s a good chance you have already spun up a Virtual Machine, Ec2, Compute Engine or Droplet. (these all are compute resources in the Cloud and have different names as it’s provided by different cloud providers)
If you’re working in RHEL (Red-Hat Enterprise Linux) or a Cent-os type Distribution then your package manager will be Yum. If you’re working with Ubuntu or Debian base distributions, then your package manager is apt.
- YUM & APT:
These two are package managers that simplify the installation, upgrade, and configuration of software packages on Linux systems. While they serve the same purpose, there are some notable differences between them.
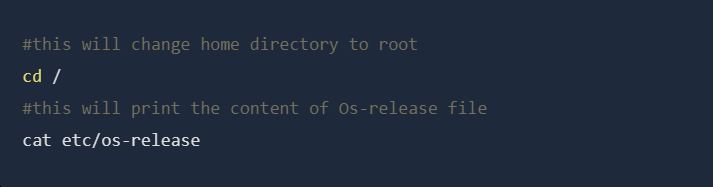
Check your Os-Release with the given command to know which package manager to use.
- Check your OS details Using the Below Command:
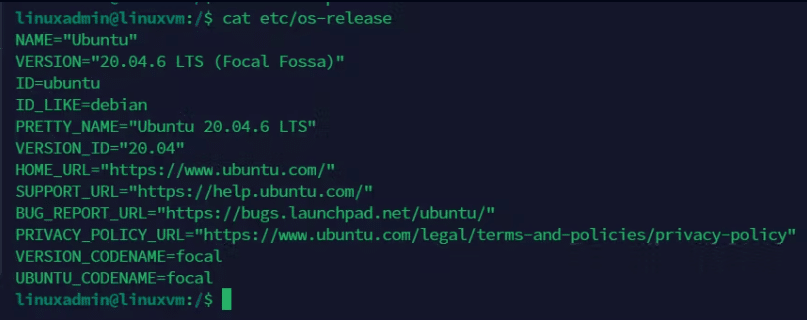
NOTE: For Cent-OS, Red Hat & Debian-based distribution commands will be the same.
I’ve run the command in both types of Linux distribution.
Output:
1) For Debian & Ubuntu base Distros:
2) For Red Hat and Cent-Os based Distros:
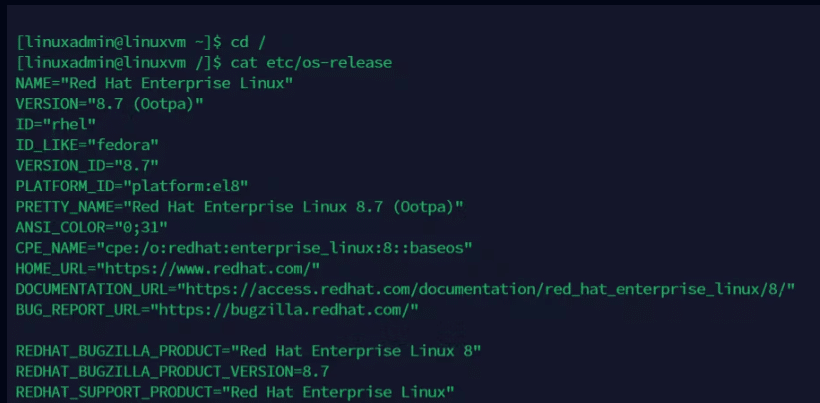
Here you can see the ID and Version ID which denotes the OS release version.
Now, on to the Apache installation part.
Step 2: Apache 2 & Httpd Installation:
Apache is the oldest and a very famous HTTP web server which support PHP and runs on both Unix and Windows-based systems. It’s an open-source project with a secure, efficient, extensible server that provides a HTTP service in sync with current HTTP standards.
2.1 Install Apache2 in Ubuntu & Debian-Based Linux:

This apt command will update the package cache to the latest
Now, let’s install Apache

After entering this command, apt will tell you which packages it plans to install and how much extra disk space they’ll take up. Press Y and hit ENTER to confirm, and the installation will proceed.
2.1.1 Adjust the Firewall to Allow Web Traffic:
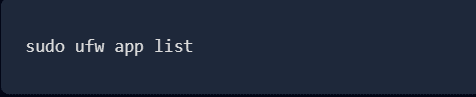
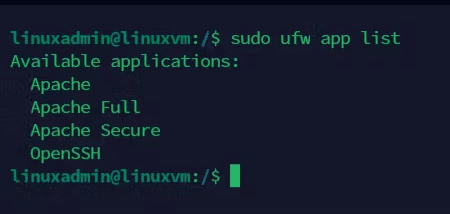
If you have followed the initial server setup instructions and enabled the UFW firewall, now make sure that your firewall allows HTTP port 80 and HTTPS port 443 traffic. You can check that UFW has an application profile for Apache like so:
Output:
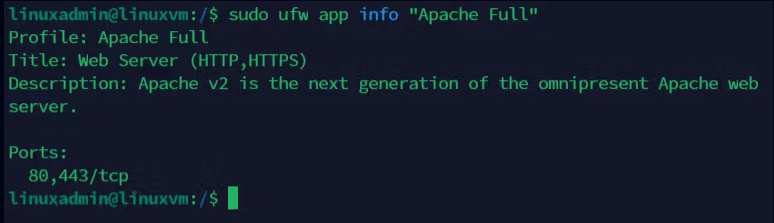
If you look at the Apache Full profile details, you will see that it enables traffic to ports 80 and 443:

Output:
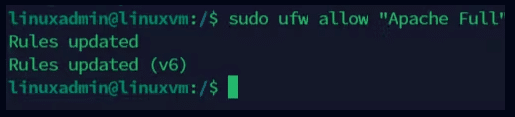
To allow HTTP and HTTPS traffic, add the Apache full allow using the given command.

Output:
Now you can check your server’s public IP and make sure everything went as planned and whether our server is showing the Server’s Default Web page. We can do so by entering the given url in your browser.
- http://your_server_ip
Output:
2.2 Install HTTPD in RHEL & Cent-OS Based Linux:
Enter the given command to Update the Package.

After updating the system packages, we can go for the Installation of Apache 2. In RHEL (RED HAT ENTERPRISE LINUX) we do not have the Apache 2 naming, so we use the HTTPD web server.
HTTPD is the same application as apache2, but some Linux distributions refer to it differently. Red Hat-based distros (CentOS, Fedora) refer to it as httpd, while Debian-based distros (Ubuntu) refer to it as Apache.
2.2.1 Install HTTPD in RHEL & Cent-Os:


After entering this command, yum will tell you which packages it plans to install and how much extra disk space they will take up. Press Y and hit ENTER to confirm, and the installation will proceed.

After successful installation, it will show installed packages and a Completion message on the terminal.
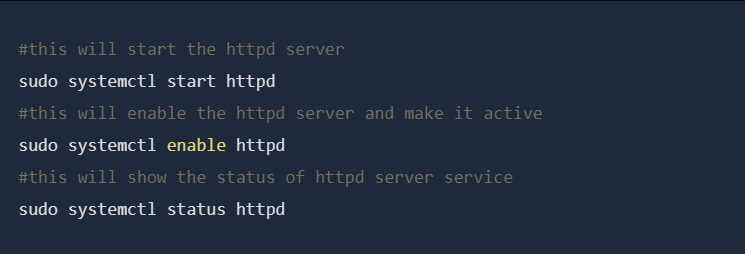
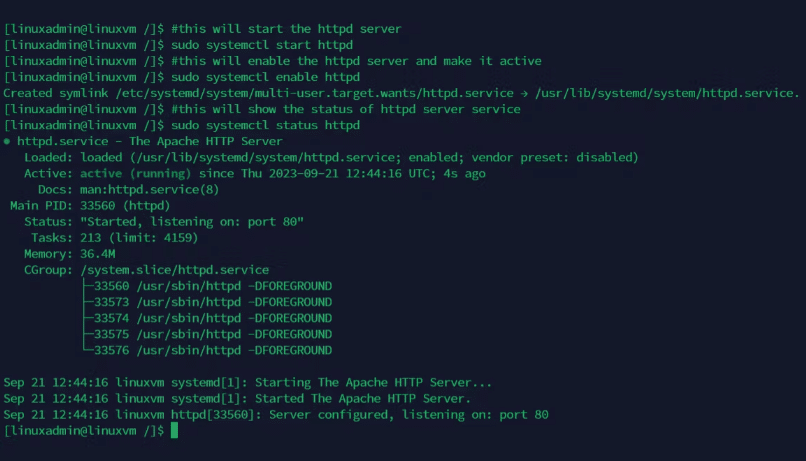
2.2.2 Start the httpd service in os:
After finishing the httpd installation, use the following commands to manage the Apache daemon since RHEL and CentOS both migrated their init scripts from SysV to Systemd.
Output:
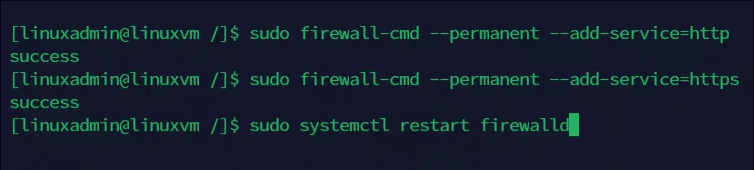
2.2.3 Adjust the Firewall to Allow Web Traffic:
In this step, make sure to allow access to HTTPD by opening ports 80 and 443 on the Firewall using the firewall-cmd, which is the default command to manage firewalld through the daemon.
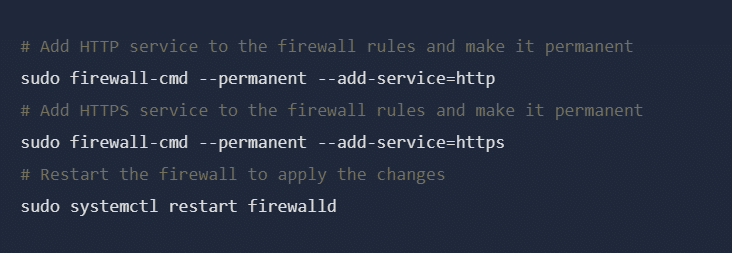
OutPut:
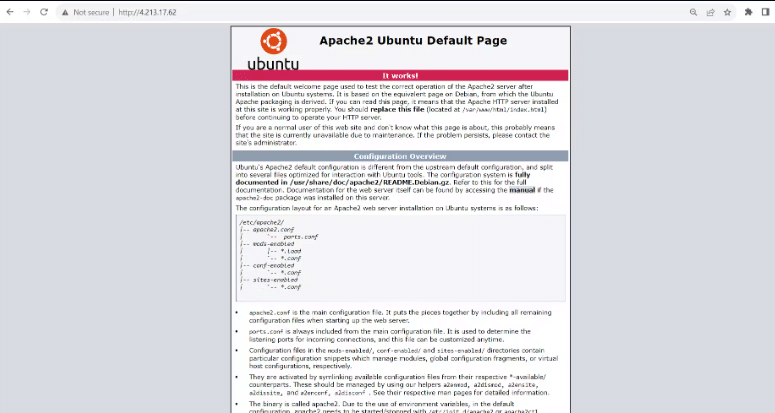
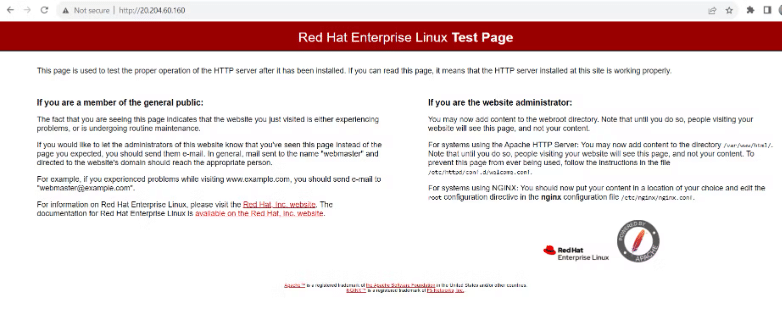
Now we reach a moment where we can go and check if the server is running or not. To verify HTTPD functionality open a remote browser and type your server IP Address using the HTTP protocol on the URL.
Now, a default page should appear like in the screenshot below.
OutPut:
3.1 MySQL installation in Ubuntu & Debian Based Linux:
Again, use apt to acquire and install this software:
When asked, press y and then press enter to continue the process.
Note: In this case, you do not have to run sudo apt update before the command. This is because you recently ran it in the commands above to install Apache. The package index on your computer should already be up to date.
After the installation is done enter the given command

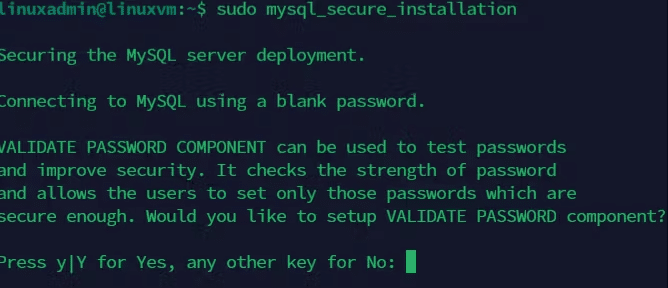
MySQL comes with some default settings that can be dangerous so make sure you make your database secure using the above command which will start an automated interactive script that comes in MySQL installation by default.
This will ask if you want to configure the VALIDATE PASSWORD PLUGIN.
NOTE: Enabling this feature in MySQL means setting password criteria, and if a password does not meet those criteria, MySQL will reject it with an error. However, if you are using software like phpMyAdmin with automatic MySQL user credential setup, weak passwords can cause problems. It is okay to keep validation disabled, but it is crucial to always use strong, unique passwords for your database credentials.
Answer Y for yes, or anything else to continue without enabling.
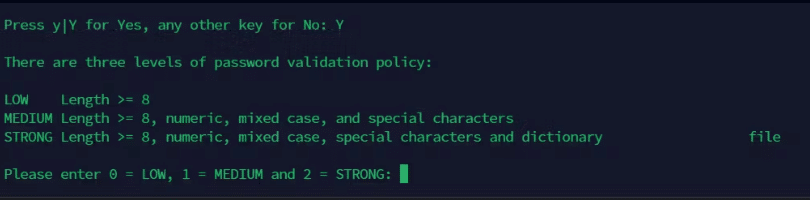
If you want a Low Security Password press 0 and press enter
for the Medium Security Password press 1 and press enter
for Strong Security Password press 2 and press enter
Here I opted for 0 and went for low security password as I am just doing a demo installation.
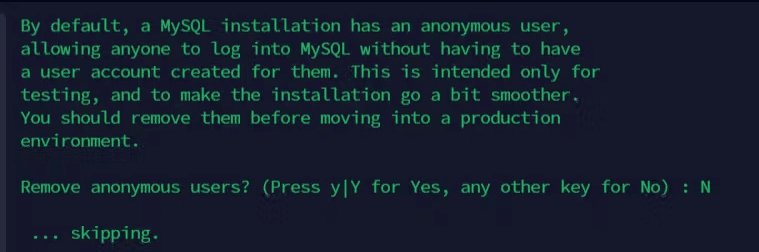
Then it will ask to remove the anonymous user. I opted No, as this account is for Testing purposes, so it is okay to not remove that user. For better security, you should remove that user.
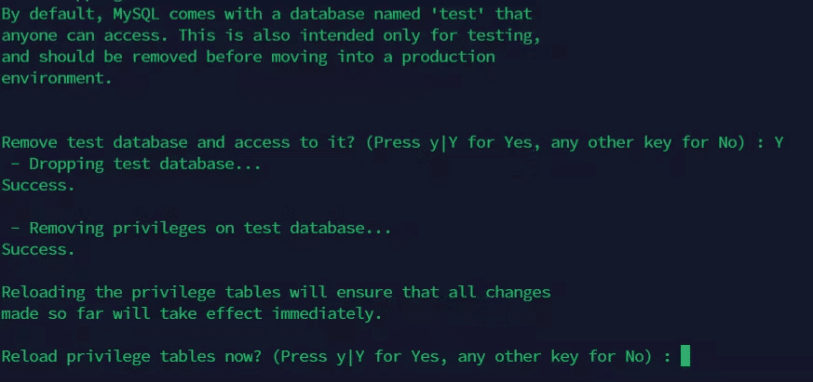
Then it will ask to remove one of the demo tables named test opt for yes then it will remove the table and say to reload the privilege table. Choose the Yes opt.

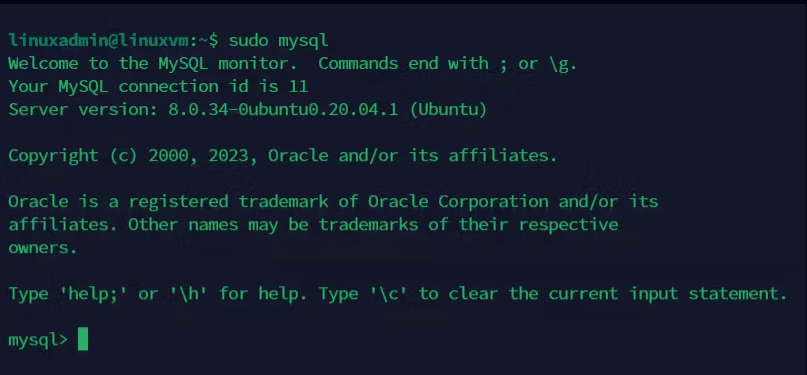
Here we are done with the installation of MySQL, Now, let us verify whether the installation was successful or not.

This will connect to the MySQL server as the administrative database user root, which is inferred using sudo when running this command. You should see output like this:
To exit the MySQL console, type:

3.2 Maria DB installation in RHEL & Cent-Os Based Linux:
The RHEL distribution switched from MySQL to MariaDB for its default database management system. To install the MariaDB database use the following command.

After entering this command, yum will again tell you which packages it plans to install and how much extra disk space it will take up. Press Y and hit ENTER to confirm. Now, the installation will proceed.

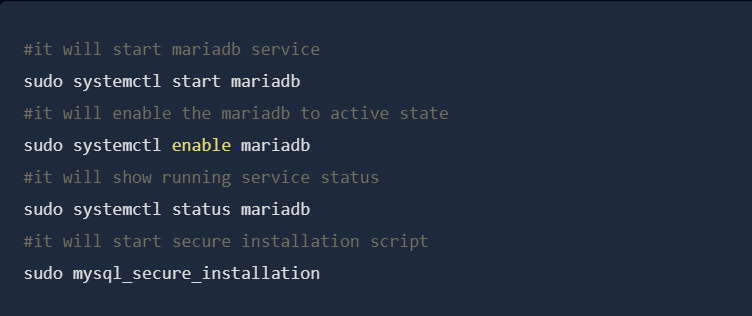
3.2.1 Start the MariaDB services:
After the Maria DB package is installed, start the database daemon and use the mysql_secure_installation script to secure the database (set a root password, disable remote login from the root, remove the test database, and remove anonymous users).
Output:
After running sudo mysql_secure_installation and selecting the appropriate options needed for best practice reasons, make the database secure by setting a root password, disable remote login from the root, remove the test database, and remove anonymous users.
Here we are done with the installation of MariaDB successfully, Now, verify whether the installation was successful or not.
Here we can make sure that we are done with installation.
Exit MariaDB using the following command.
4.1 PHP installation in Ubuntu & Debian Based Linux :
This single command installs PHP, the module to integrate it with Apache, and the package to enable PHP to communicate with the MySQL databases. It will ask for permission, so press y and then press enter.
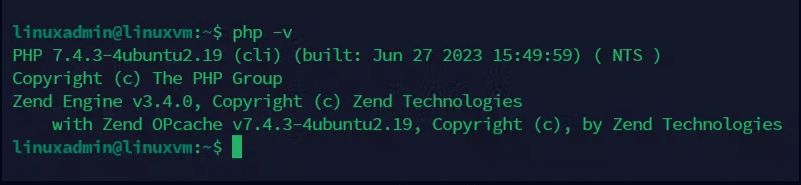
After the installation is done, we can check the PHP version by using the given command.
Output:
Now you are done with the LAMP installation in Ubuntu and Debian Distribution.
4.2 PHP installation in RHEL & Cent-Os Based Linux:
First, you need to configure EPEL and REMI repositories on your system. Remi repository contains the latest PHP packages for CentOS and RHEL systems.
Use the below command to configure the EPEL repository on your system.
- sudo yum -y install https://dl.fedoraproject.org/pub/epel/epel-release-latest-8.noarch.rpm
After that, configure the REMI repository by running the below command.
- sudo yum -y install https://rpms.remirepo.net/enterprise/remi-release-8.rpm
The Remi repository contains PHP 8.2, 8.1, 8.0, and 7.4 packages. You can enable the desired repository and install PHP packages with the below steps.
Once the repository installation is finished, list all the available PHP module streams with the following command.
- sudo yum module list php
With this, you will get all the available PHP versions.
Output:
For example, I need to install PHP 8.2. So, I choose php: remi-8.2. You can select another version per your requirements:
- sudo yum module enable php:remi-8.2
Finally, run the following command to install PHP on your system.
- sudo yum install php php-cli php-common
You can verify the installed PHP version using the below command: – php –v
Now we are done with the Lamp Installation.
Enjoy your Lamp Machine by using it to launch the Projects and Websites for your client, customers, and audience.
Conclusion:
In conclusion, a LAMP stack is a powerful combination of Linux (Operating System), Apache (Web Server), MySQL or MariaDB (Database), and PHP (Programming Language) used by web developers to create and deploy websites. This stack provides a robust foundation for building dynamic and database-driven web applications. The installation process involves configuring each component, ensuring proper compatibility, and securing the setup. Once installed and configured, a LAMP stack offers a reliable environment for hosting websites and web applications.