What is Multitenancy ?
Multitenancy is a software architecture design in which a single instance of an application or system serves multiple customers, or tenants, each using the system as if it were their own isolated environment. This approach is particularly common in cloud-based applications or Software-as-a-Service (SaaS) platforms. The term “tenant” refers to each individual customer or user group who has their own set of data and configuration within the shared system.
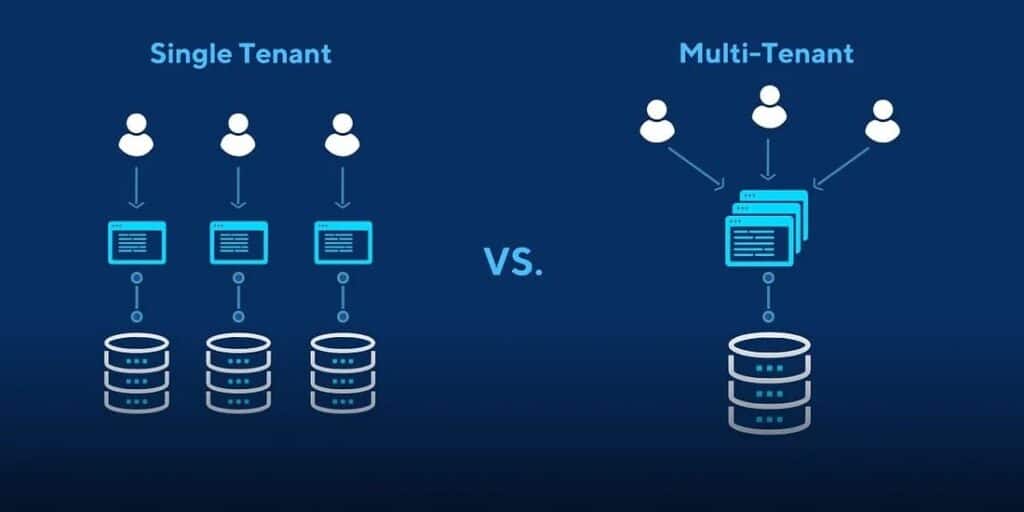
Multi-Tenant and Single Tenant Differences
Single-Tenant Architecture: In a single-tenant architecture, each customer, or tenant has their own dedicated instance of the application or system, which operates in isolation from other tenants. This means that each customer gets their separate set of resources, databases, and infrastructure, resulting in isolation and complete independence. Each instance is deployed and managed separately for each tenant, and they do not share any resources with each other.
Multitenant Architecture: In a multi-tenant architecture, a single instance of the application or system serves multiple customers or tenants simultaneously. Each tenant’s data is logically separated from others, but they all share the same underlying infrastructure, code base, and application instance. The data for each tenant is typically stored in separate databases or schemas, ensuring privacy and security.
Python Framework and Multi-Tenancy
Let’s begin with some fun in code:-
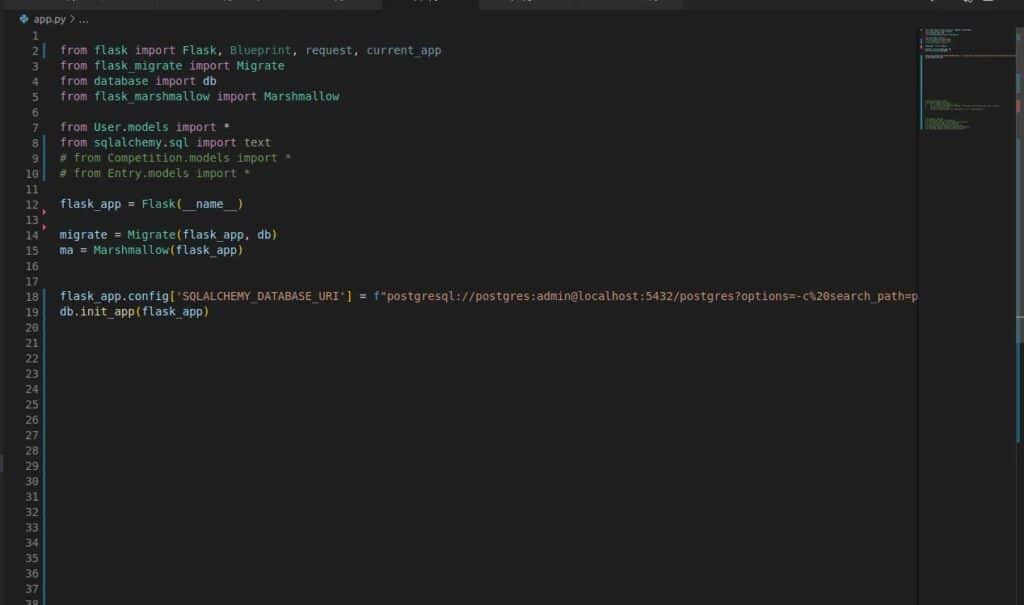
Step-1:- Create An app in flask and connect to your local postgresql database
- To connect your app, to local DB you have to use sqlalchemy. You can view the documentation here.
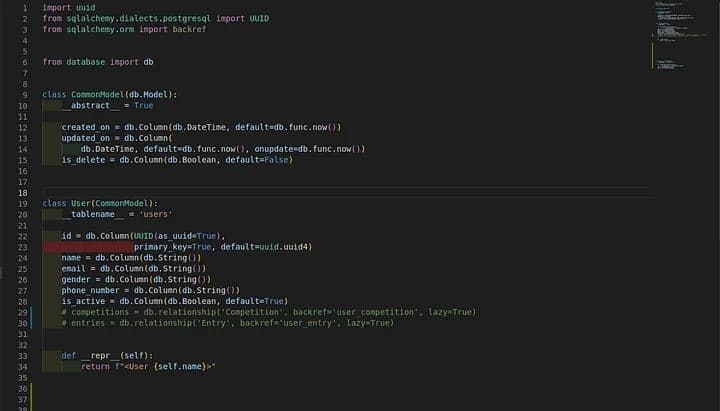
Step-2:- Create a model name and run the migrations script to store the table in the DB
Step-3:- Create API for adding a user using the blueprint. To know more about blueprint press here.
- Use the flask resource for API creation, it is based on a Class Based View.
Step-4:- Now, make sure that we have the tenant table(micro-service) in the database which shows which host the schema need to access.
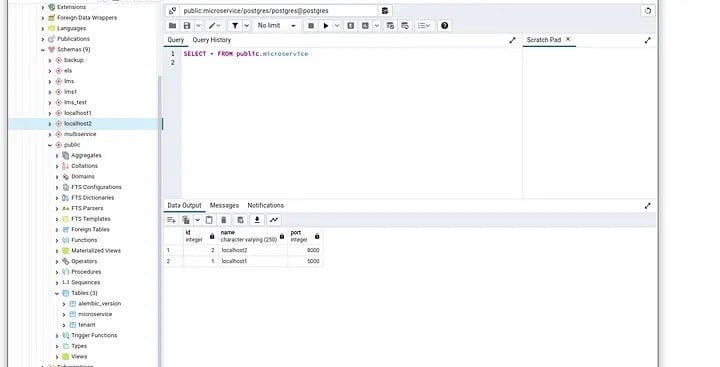
- I created that table in public schema, so according to port, I will fetch the correct schema. Note, you can use any host format.
- As the picture also depicts, I have already created two schemas. These include Localhost1 and Localhost2, where both the schemas are having the same user model.
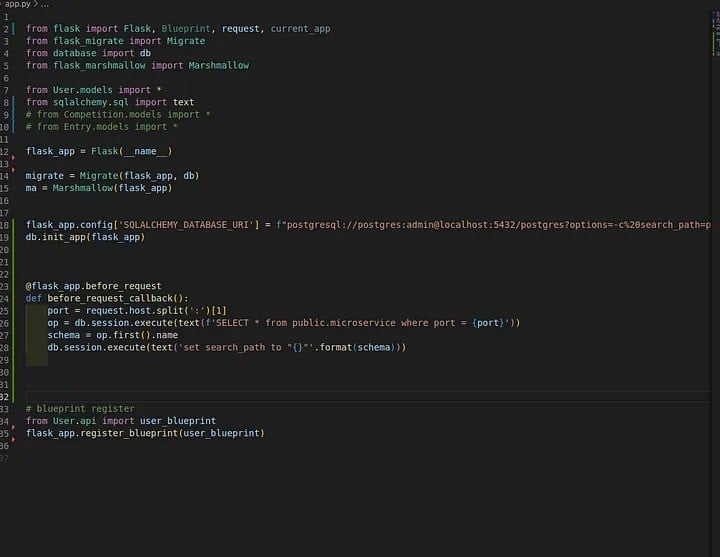
Step-5:- Now we just want to add one function called the before_request, which is used to fetch the schema name according to port.
That’s it. Well done!
Now your multi-tenant support in your app is ready
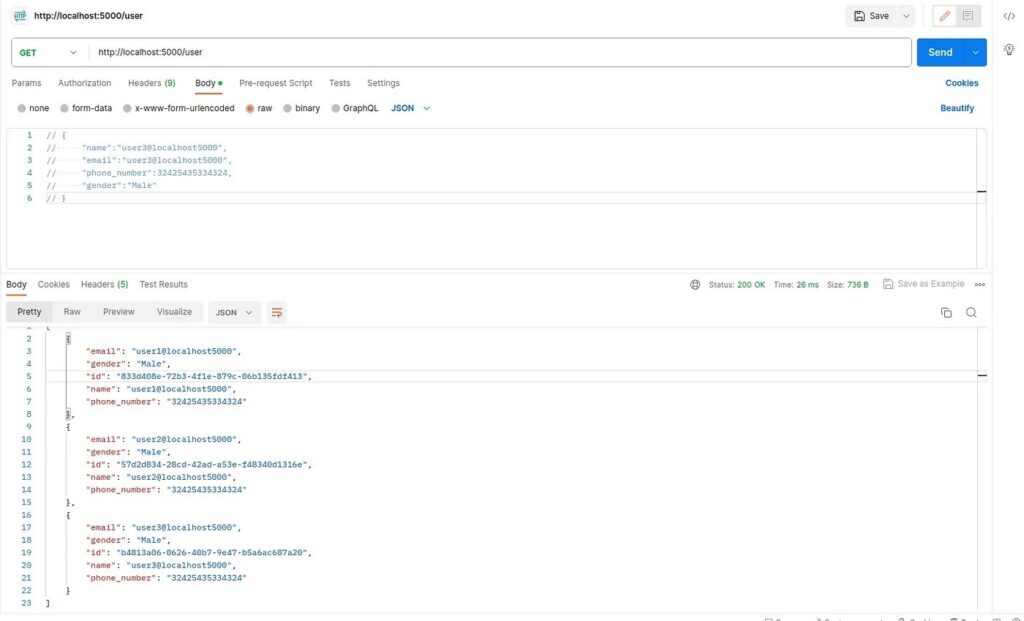
As you can see in the image, I had to add data via port 5000. Only through that port could I view the data.
Same as the port 8000
For More Infocheck the video link below:-